J-POLE Building 2 meter Copper Pipe Jpole
FULL PALNS & HOW TO BELOW:
K0bet home built " SUPER J-pole " I put this J-pole together using 1/2 inch copper pipe
and parts from home 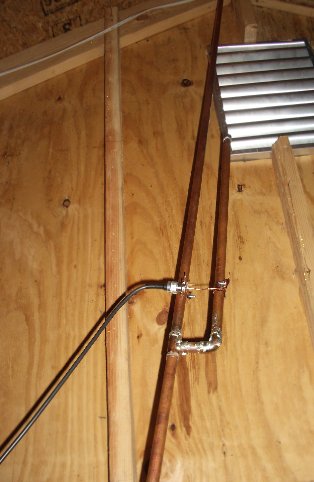 depot, minus the one S0-239 antenna connector that I bought at a local ham radio store. ( RadioShack also has SO-239 connectors). I had been reading about the best way to put together a J-Pole for use on my FT-2900 2 meter band radio.
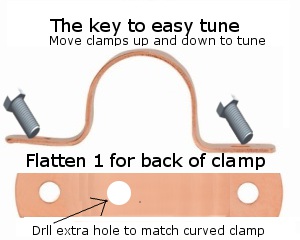
After several days of reading I decided go to home depot with my parts list and buy some copper. The only significant change I made to the normal plans was attaching the feed line using copper hose clamps. I decided that it would be easier to adjust the tuning & SWR by using copper hose clamps and machine screws rather than soldering directly to the pipe. The tuning is simple,
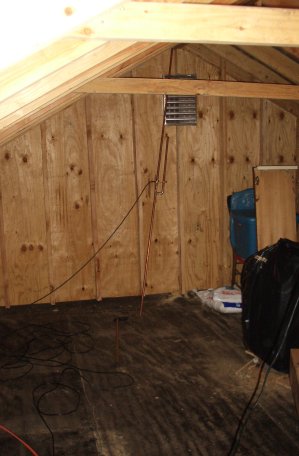
unscrew nuts and move the clamps up or down until you get the SWR correct. ( my clamps are about 3 inches from horizontal T & Elbow). I took a lot of big pictures because there is a lot of info on how to build a J-POLE but there are no sites with good photos of how it was built. A decent photo is worth a thousand words. This J-POLE hits repeaters over 50 miles away. Everyone says I come in full and clear. One old guy told me to stop, don't touch, the sound is so good that if I bumped it taking pictures I might cry.
I'm no plumber and dint have flux, I know my solder is blobbed on.
tools decided that it would be easier to adjust the tuning & SWR by using copper hose clamps and machine screws rather than soldering directly to the pipe. The tuning is simple, unscrew nuts and move the clamps up or down until you get the SWR correct. ( my clamps are about 3 inches from horizontal T & Elbow). I took a lot of big pictures because there is a lot of info on how to build a J-POLE but there are no sites with good photos of how it was built. A decent photo is worth a thousand words. This J-POLE hits repeaters over 50 miles away. Everyone says I come in full and clear. One old guy told me to stop, don't touch, the sound is so good that if I bumped it taking pictures I might cry. I'm no plumber and dint have flux, I know my solder is blobbed on.
 <-- SUPER SIZE HIGH RESOULTION PHOTO
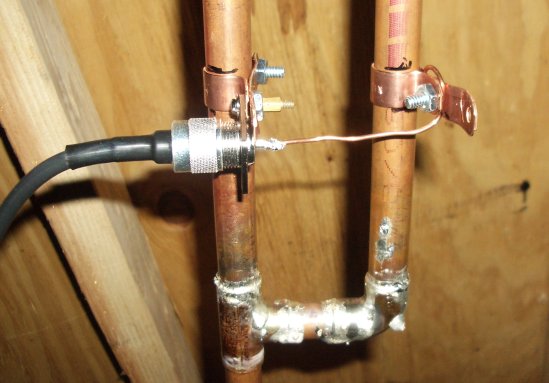
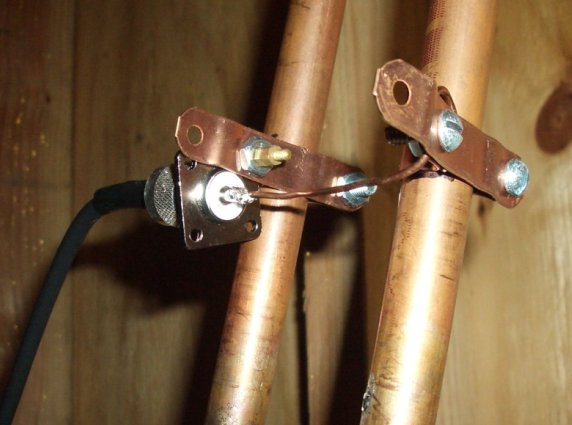
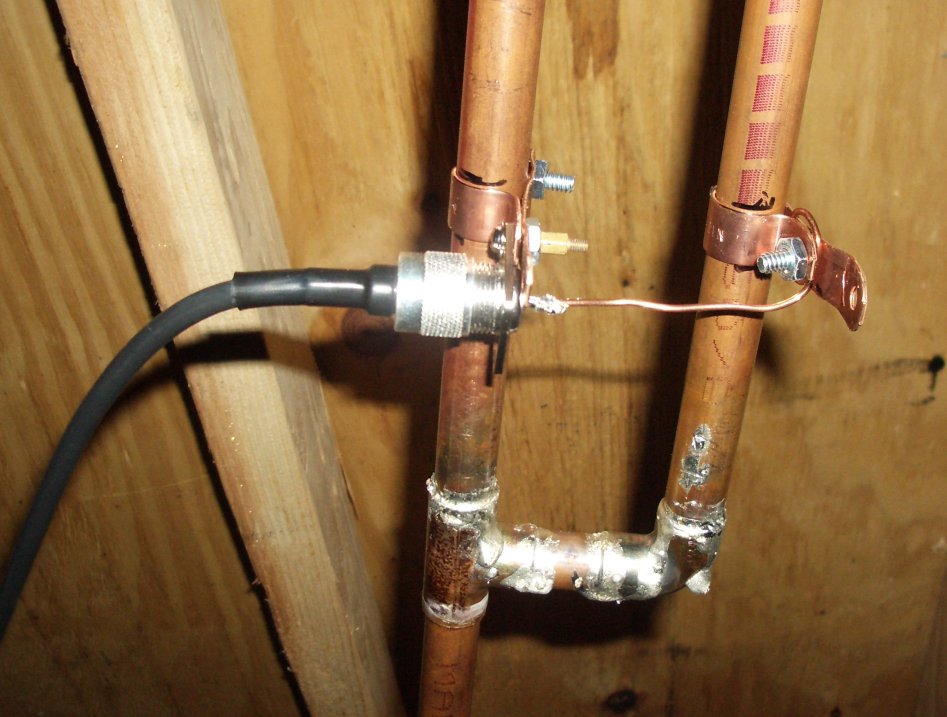
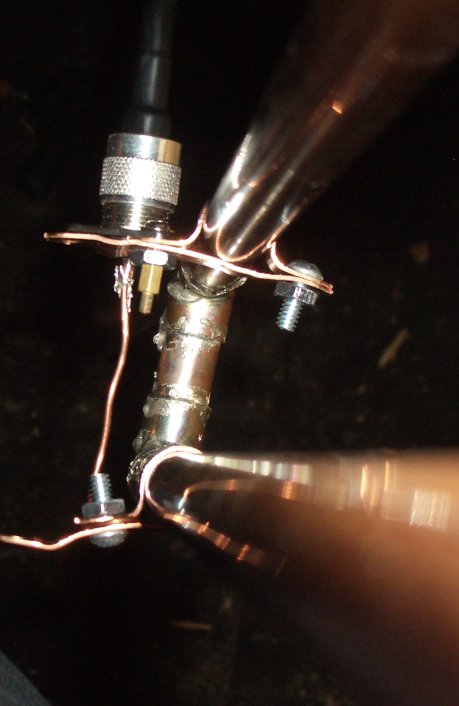
Take a close look at how I used a mother board screw and mother board riser peg to attach the SO-239 to the hose clamp screw. There wasn't a good way to get the SO-239 to stay in place. You may have to play with a different screw for the SO-239 to attach to the clamp. A smaller machine screw and nut would work best.
TIP: Notice how the screw washers are both facing toward each other. It is needed to tighten the washer to the feed line.
The long end has the so-239 connection to RG8 coax the short end has the machine screw nut holding the wire loop around the waster nut . This is because the long end is stronger than the sort end.
J-POLE - Jpole Building Design Pans
JPOLE CONSTRUCTION
1 - SO-239 connector (Ham Shop or last resort Radio Shack)
1 - 10' length of 1/2" copper
4 - copper 1/2 inch hose clamps
1 - 1/2" copper tubing "T" fitting
1 - 1/2" copper tubing elbow fitting
2 - 1/2" copper end caps
4 - machine screws with nuts ( take the hose clamp over and make sure the screw will fit the clamp opening
1 - 1 foot romex or other 14 gage copper wire
1 - 50 ohm coax cable with connector for radio.
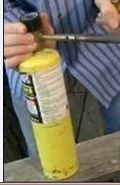
Tools: propane torch, pipe cutter, solder, heavy grit sand paper, hammer, drill, Blade (drill to make new hole in flattened copper hose clamp.
Cut the pipe to length using copper pipe cutter.
Using your solder
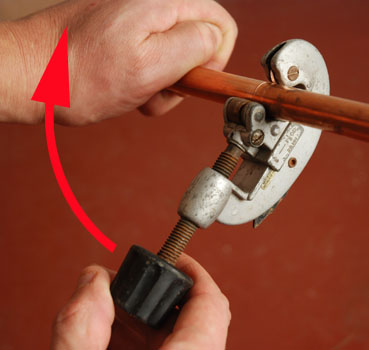
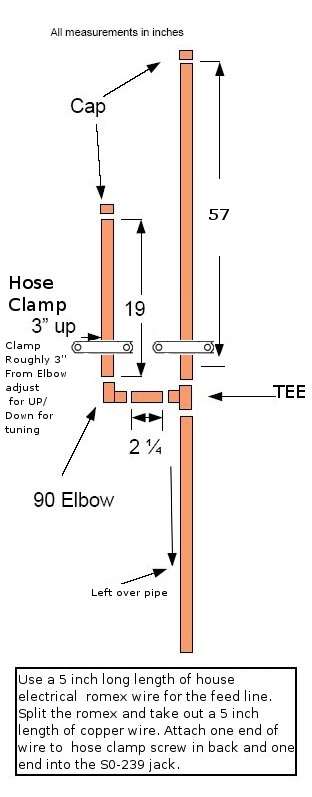
Using pipe cuter, cut the pipe to the size. Three lengths 57 inch long, 2 1/4 inch long and one 19 inch long. The left over pipe goes in the bottom for support mount. I didn't solder the long bottom left over end that the pole stands on.
Cut the romex or other 14 gage wire to 4 inch length.
Take 2 of the hose clams and pound them flat. This will be the back for the support of the clamp to mount against the pipe. Since 2 of the clamps have been flattened. You will have to drill 2 new holes in the flattened Clamp. Make the 2 new holes the same size as the original holes that cannot be used. See how there are extra holes left in flat clamps next to red arrow.

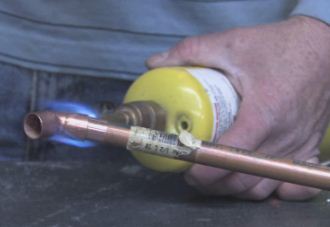
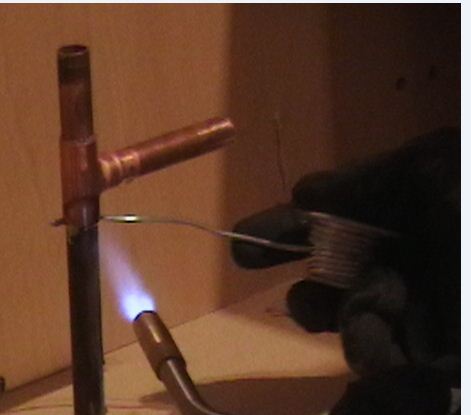
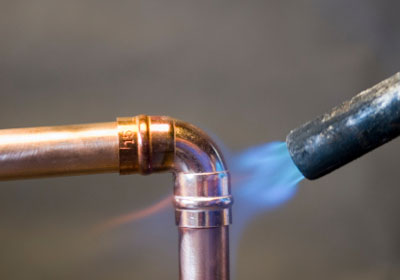
Use steel wool to clean the copper and solder the antenna together as you would with normal copper tubing. Make sure you get the joints snug.
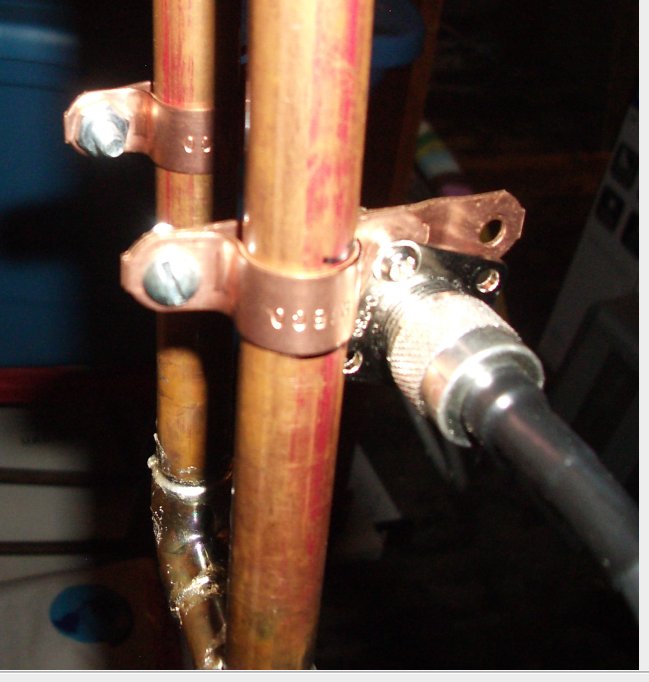
Attach the hose clamps about 3 inches up from horizontal 2 1/4 elbow and "T". Next attach screws to the hose clamps and SO-239. The Feed line should be centered between the clamps.
Top view of J-pole Hose clams with machine screws. Small amount of solder to feed line and SO-239 connection. Look at the loop made around the machine screw nut to hold it in place for the feedline.
.
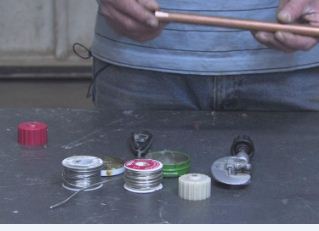
Tools and a few pipe solder pics